Rapid Animation Development
If you’ve been following along, you should now have some idea about how basic frame-by-frame animation works in Flash. But animating a sequence one frame after another is a tedious process - especially when the sequence is a complex one - and Flash comes with some powerful tools to assist in this process.
This week, I’m going to take a look at the alternative to frame-by-frame animation, a technique known as “tweening” in Flash lingo. I’ll be showing you how Flash’s powerful tweening tools can substantially cut down the time you spend on an animation clip, with some simple demonstrations of how they can be used effectively.
For The Cool In You
Most people - novices included - consider tweening to be the coolest thing about Flash. It’s not hard to understand why - Flash’s tweening capabilities, combined with some easy-to-learn techniques, allow novices and experts alike to quickly and easily create good-looking animation sequences with minimal effort.
Find that hard to believe? I’ll do my best to make you a believer by the end of this article - but first, a little theory.
A tweened animation differs from the frame-by-frame animation you learnt about before in that it doesn’t require the animator to animate each and every frame of the animation clip; instead, the animator need only specify the starting and ending frame of the clip, with Flash creating all the intermediate frames.
Consider a simple example: a stone rolling downhill. In traditional frame-by-frame animation, it would be necessary to animate the stone every step of the way on its downhill journey; with tweening, it’s only necessary to create two frames - the initial frame, with the stone at the top of the hill, and the final frame, with the stone at the bottom - and Flash will do the rest.
Flash offers two types of tweening: “shape tweening”, used primarily to morph one shape into another; and “motion tweening”, used to create the illusion of motion (although, as you’ll see, you can do a lot more with it too). Shape tweening cannot be applied to symbol instances or text blocks, while motion tweening works on symbol instances, grouped elements and text blocks.
The Colour Purple
Let’s begin with a simple motion tween that will better illustrate the concept. Open up a new Flash movie, and use the Circle tool to draw a simple ellipse. Fill it with your favourite colour.

You’ll notice that Flash automatically adds a keyframe at frame #1 when you create the ellipse.

Convert the ellipse to a graphic symbol - it should show up in the Library window.
Now, click on frame #10, insert a new keyframe, and move the ellipse to a new location on the Stage. Go back to frame #1, and pop open the Window -> Panels -> Frame panel. Select “Motion” in the Tweening box. The area between frames #1 and #10 should fill up with a light purple colour and a solid arrow - this indicates a motion tween.

Play the animation - your ellipse should move smoothly from its original location to the new location you specified.
And that’s your very first motion tween. Simple, huh?
A Tint Of Scarlet
How about something a little more complex? Go back to frame #10, right-click the ellipse, and choose the Scale option. Modify the ellipse by pulling the scaling handles until you have something that looks like this:

Play the clip again - your ellipse should change shape while its moving across the Stage.
Let’s add a little colour shift as well, shall we? With the instance in frame #10 still selected, pop open the Window -> Panels -> Effect dialog, and choose “Tint” from the drop-down menu. Pick a tint colour - the fill colour of the flattened ellipse in frame #10 should immediately change to the selected colour.

When you play the clip, your ellipse will not only change shape, but colour too.
Taking The Scenic Route
By default, Flash chooses the shortest distance between the starting and ending positions of the object as the motion path. If this is not to your requirements, you also have the option of tweening motion along a path that you define.
Let’s consider a new example to illustrate this better. Open up a new Flash movie, and at frame #1, create a small dot with the Brush tool. Convert it to a graphic symbol.

Next, move to frame #25, insert a new keyframe and move the dot to the other end of the stage.

Create a motion tween and play the clip - your dot will travel horizontally across the Stage, since that’s the shortest distance between the two positions.
To add your own motion path, right-click the layer containing the dot, and use the “Add Motion Guide” command to add a new motion guide layer - this layer will hold the path for motion path for your tween.

Draw the path that you’d like the symbol to traverse with the Pen, Pencil, Brush or Pen tool.

Note that you need to “snap” the symbol to the beginning and end of the motion path after you’re done - you can do this by selecting the symbol with the Arrow tool and dragging it to the appropriate end-point of the path until the symbol’s “registration point” (the little hollow dot in the center) snaps to the end-point of the path. When you play the clip again, the dot should travel along the path you’ve just created.
You can choose to have either the baseline of the symbol, and/or its registration point, oriented towards the motion path, by selecting the “Orient To Path” and “Snap” options respectively in the Frame panel.
Bouncing Balls
Motion tweening is a great way to create animation clips that look good and are simple to put together - as this next example demonstrates.
How did I do this? Very simple.
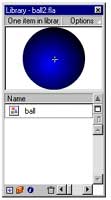
First, draw a circle on the Stage and fill it with a gradient fill - I’ve used blue, but feel free to experiment - to create a smooth bouncing ball. Convert it to a graphic symbol - you’ll be using this symbol throughout the exercise.

Next, select frame #7, insert a new keyframe, and move the ball vertically downwards. Use the scaling handles to flatten it vertically and stretch it horizontally, so that it looks like it’s been squashed.

Go back to frame #1 and create a motion tween between the two keyframes (you can also do this by right-clicking anywhere between the two keyframes and selecting the “Create Motion Tween” command)
Now, move on to frame #14, insert a new keyframe, and move the ball back up to its original location. Pop open the Transform panel, and use the Reset button (bottom right corner) to restore the symbol to its original state. Insert a motion tween between frame #7 and frame #14.

When you play your clip, you’ll see something like this:
If you think the clip would look better if it played a little faster, you can alter the frame rate through the Modify -> Movie dialog.

There are just a couple more steps to this animation. First, select frame #7 (the flattened ball) and move the symbol about 100 pixels to the left. Do the same with frame #14, the final keyframe, except that the symbol should be moved to the right When you play the clip, the ball will appear to bounce across the screen.

And finally, the fade-in/fade-out effect. Select the ball in the first frame, and use the Effects panel to add an alpha effect, so that the ball is partially transparent. Do the same for the final keyframe.This time, when you play the clip back, the ball will slowly solidify as it moves downwards, and fade out as it bounces upwards.
How long did that take? About five minutes, I’d say - and the result is a pretty good-looking animation clip. Plus, since the entire clip is built using a symbol, you can easily alter the colour and size of the ball in symbol-editing mode, and have your changes immediately reflected in the clip itself. Try it yourself and you’ll see what I mean!
Zooming In
Another effect that’s simple to accomplish with motion tweening is the so-called “zoom” effect.
As you might have already figured, this is not at all difficult in Flash. For your first keyframe, simply create a symbol - image or text block - which is miniscule in size

and then scale it up for your second keyframe.

When you tween the two together, if you do it right, it will appear as though you are “zooming in” to the image.
Curves In All The Right Places
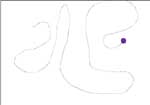
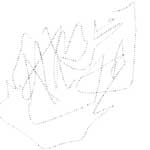
Next up, shape tweening. Open up a new Flash movie and use the Pen tool to draw a random series of curves - you should end up with a mess of lines and curves, which might look something like this.

Now click on frame #30, and insert a new keyframe. Delete the shape you just created, and create a new one, again using the Pen tool. Your new shape might look something like this:

Now that you have two separate shapes, you can proceed to tween them together. Click the first keyframe, and sellect “Shape” as the tweening type in the Frame pop-up. Flash will fill the intermediate frames with a light green tint, and a solid arrow - this indicates a shape tween.

When you play the animation clip back, your first shape will slowly morph into the second shape - like this:
Yes, it serves no artistic value - but it looks cool, nevertheless. And you can also alter the colour of the shape as the transition takes place - simply stroke/fill one or both shapes with a different colour and line style.
Note, however, that shape tweening will not work on text blocks and symbols.
Taking A Hint…Or Two…Or Three
Flash also allows you to control the manner in which the shape morphs happen with a feature known as “shape hints” - essentially, tiny markers that allow you to create a one-to-one correspondence between specific points in the initial and final shapes.
Let’s suppose you had two shapes, which looked like this.


By default, when Flash tweens them together, the sequence looks like this.
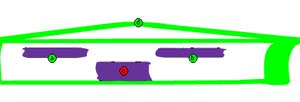
But when I add shape hints to the starting and ending shapes


the shape tween tries to ensure that the marked points correspond to each other during the tween.
You can add a shape hint through the Modify -> Transform -> Add Shape Hint menu command, or with the Ctrl-Shift-H keyboard shortcut.
And that’s about it for this week. Next time, I’ll be talking about using the Text tool, and I’ll also show you how to create clickable buttons for your animation clip. Have a great Christmas and New Year - and remember, don’t drink and drive.
Note: All examples in this article have been tested on Macromedia Flash 5.0. Examples are illustrative only, and are not meant for a production environment. YMMV!
This article was first published on 21 Dec 2000.