Double-Edged Sword
They say that a picture is worth a thousand words.
Personally, I don’t think it’s that cut-and-dried. Sure, if the picture is a moody shot of the Manhattan skyline, or a clip from MTV’s “The Grind”, I can understand why a few people might consider it preferable to words. But, at the same time, any Web surfer who’s seen an image-heavy Web site download over a s-l-o-w dial-up link would agree that pictures aren’t always a good thing.
Where am I going with this?
My point is very simple: images on the Web are, and always have been, a double-edged sword. Correctly used, they can enhance a Web site’s appearance and usability, while incorrect usage can frustrate your visitors and earn you a few thousand megabytes of hate mail.
Over the next few pages, you’re going to learn how to create images using PHP’s image manipulation capabilities. PHP makes image creation very simple - a few lines of code and you’ll have an image that can be easily reproduced, modified and used on your Web site.
However, there’s one important thing you need to remember, as you revel in your new-found power - just because PHP makes it easier does not, in itself, qualify as a reason to make your Web site top-heavy with GIFs and JPEGs. You need to have a good reason for everything you do, and that rule applies as much on the Web as anywhere else - a site full of pretty but non-functional images is not likely to endear your Web site visitors to you, especially if they’re on a slow modem link.
OK. Enough talk. Let’s get down to business.
Getting Down To Brass Tacks
In order to use PHP’s image manipulation capabilities, you need to have the GD library installed on your system. If you’re working on Linux, you should already have this library; if not, you can download it from http://www.boutell.com/gd/ and compile it for your box. If you’re running Windows, a far easier alternative is to visit the nice guys at http://php.weblogs.com/easywindows/ and download the “php_gd” DLL that they’ve put together for PHP4/Windows users.
A word about GD: GD versions earlier than 1.6 include support for GIF and JPEG formats, while versions greater than 1.6 include support for PNG and JPEG formats. You need to see which formats your particular version supports, so that you don’t run into unexpected problems when creating images; the methods described below will work for all available formats.
If you’re planning on using TrueType fonts in your images, you’ll also need the FreeType library from http://www.freetype.org
Once you’ve got everything in place, it’s time to create a basic image. Here goes:
<?php
Header("Content-Type: image/gif");
$im = ImageCreate(500, 75);
$red = ImageColorAllocate($im, 255, 0, 0);
ImageFill($im, 100, 100, $red);
ImageGIF($im);
?>
Save this file, and then browse to it through your Web browser. You should see an image that looks like this:

The Four-Step Program
Let’s take a closer look at the code above.
Header("Content-Type: image/gif");
The first thing I’ve done is send an HTTP header to the browser stating the type for the data that is about to follow - in this case, the pre-defined type “image/gif” tells the browser that it’s about to receive a GIF file.
When creating images with PHP, it’s mandatory to send this header to the browser so that it can render your image correctly. PNG images would use
Header("Content-Type: image/png");
while JPEGs go with
Header("Content-Type: image/jpeg");
You should also note that the “Content-Type” header can only be sent once per page - which means that your PHP image generation code must be in a file of its own, and cannot be mixed with regular PHP/HTML code (which usually goes out as “text/html”).
Now, creating an image in PHP involves four basic steps: creating a handle for the image; registering colours for the image; drawing to the image handle with various pre-defined draw functions; and creating the final image and releasing it to the browser.
Let’s take the first step - creating a handle for the image.
$im = ImageCreate(500, 75);
PHP’s ImageCreate() function is used to create a handle for the image, which is assigned to the variable $im. The ImageCreate() function requires the height and width of the image - in this case, 500 pixels wide and 75 pixels high. By default, the image is filled with the colour black.
Next up, colours.
$red = ImageColorAllocate($im, 255, 0, 0);
In PHP, it’s necessary to register all the colours that you plan to use in the image with the ImageColorAllocate() function, which accepts RGB values as parameters. The colour is then assigned to a variable, which can be used with various draw functions.
Once the image handler and color variables have been created, it’s time to begin doing something with them - and PHP comes with a number of functions that can fill your image, draw shapes on it, make it transparent, write strings to it, and more.
ImageFill($im, 0, 0, $red);
Here, I’ve used the ImageFill() function to “flood-fill” the image with the colour red.
An important point to remember when calculating specific pixel coordinates here is that the origin (0,0) is actually at the top left corner of the image, not the more traditional bottom left corner; therefore, the coordinates (500,75) would refer to the bottom right corner in the example above.
Finally, it’s time to release the image to the browser; this is done with the ImageGIF() function.
ImageGIF($im);
PNG images would use the corresponding ImagePNG() function, while JPEGs have the ImageJPEG() function.
What’s In A Name?
Now, how about writing something to the image?
<?php
// send header
Header("Content-Type: image/gif");

// create image and colours
$im = ImageCreate(500, 75);
$red = ImageColorAllocate($im, 255, 0, 0);
$black = ImageColorAllocate($im, 0, 0, 0);

// fill image
ImageFill($im, 0, 0, $red);

// write string at (210,30) in black
ImageString($im, 4, 210, 30, "Hello John", $black);

// release image
ImageGIF($im);
?>
The ImageString() function is used to write a string to a specific point on the image. In the example above, it would print the string “Hello John” somewhere near the center of the image.

The ImageString() function requires a number of parameters: the image resource handler, the font number, the coordinate pair at which to begin writing the string, the string itself and the colour in which the string is to be printed.
When writing text with the ImageString() function, you can choose one of PHP’s five pre-defined fixed-width fonts for the string; these fonts are numbered from 1 to 5. In the example above, I’ve used font number 4 for the string.
The next example demonstrates how PHP can be used to create images which change dynamically, in response to user input. A simple form asks the user for a name, and then generates an image containing the name entered into the form.
Here’s the form:
<html>
<head>
<basefont face="Arial">
</head>

<body>

<form action="name.php4" method="get">
Enter your name:<input type=text name=name>
<br>
<input type=submit>
</form>


</body>
</html>
And here’s the code to generate the image:
<?php
// name.php4 - generate an image with user's name

// send header
Header("Content-Type: image/gif");

// check for input
if ($name) {
    $string = "Hello " . $name;
} else {
    $string = "Hello John";
}


// create image and colours
$im = ImageCreate(500, 75);
$red = ImageColorAllocate($im, 255, 0, 0);
$black = ImageColorAllocate($im, 0, 0, 0);

// fill image
ImageFill($im, 0, 0, $red);

// write string at (210,30) in black
ImageString($im, 4, 210, 30, $string, $black);

// release image
ImageGIF($im);
?>
In addition to the ImageString() function, used to write text horizontally, PHP also offers the ImageStringUp() function, used to write text vertically; the ImageChar() and ImageCharUp() functions, used to write a single character of a string; and the ImageFontHeight() and ImageFontWidth() functions, which are used to get the height and width of a specific font, and which I’ve demonstrated in the next example.
Lining Things Up
Now, how about adding a line below the name?
<?php
// send header
Header("Content-Type: image/gif");

// check for input
if ($name) {
    $string = "Hello " . $name;
} else {
    $string = "Hello John";
}


// create image and colours
$im = ImageCreate(500, 75);
$red = ImageColorAllocate($im, 255, 0, 0);
$black = ImageColorAllocate($im, 0, 0, 0);

// fill image
ImageFill($im, 0, 0, $red);

// write string at (210,30) in black
ImageString($im, 4, 210, 30, $string, $black);

// get font width
$font_width = ImageFontWidth(4);

// calculate string width
$string_width = $font_width * (strlen($string));

// add a line beginning at (210,50) in black
ImageLine($im, 210, 50, (210+$string_width), 50, $black);

// release image
ImageGIF($im);
?>
Here’s what it looks like:

The ImageLine() and ImageDashedLine() functions are used to draw lines on the image, given two sets of coordinates.
In the example above, since I have no idea how long the input string will be, I’ve calculated the end coordinate by finding out the width of a particular character of the font with ImageFontWidth() and then multiplying that number by the number of characters in the string. This returns the width of the string, thereby making it possible to calculate the end-point of the line.
Waving The Flag
In addition to lines, PHP also allows you to draw other shapes on the image. The next example demonstrates how to draw filled rectangles on the image to create a fairly-acceptable replica of the French national flag.
<?php
// header
Header("Content-Type: image/gif");

// set up image and colours
$im = ImageCreate(300, 300);
$red = ImageColorAllocate($im, 255, 0, 0);
$white = ImageColorAllocate($im, 255, 255, 255);
$blue = ImageColorAllocate($im, 0, 0, 255);

// fill with white
ImageFill($im, 0, 0, $white);

// draw filled rectangles
ImageFilledRectangle($im, 0, 0, 100, 300, $blue);
ImageFilledRectangle($im, 200, 0, 300, 300, $red);

// output to browser
ImageGIF($im);
?>
Here’s what it looks like:

In this case, I’ve first turned the whole image white, and then created two filled rectangles, one blue and the other red. The numbers you see in the call to the ImageFilledRectangle() function are coordinates of the top left and bottom right corners of the rectangles respectively.
In addition to rectangles, PHP allows you to draw other types of polygonal shapes also - notice how I’ve used the ImagePolygon() function to draw a pentagon in the following example:
<?php
// header
Header("Content-Type: image/gif");

// set up image and colours
$im = ImageCreate(300, 300);
$green = ImageColorAllocate($im, 0, 255, 0);
$white = ImageColorAllocate($im, 255, 255, 255);
$blue = ImageColorAllocate($im, 0, 0, 255);

// set vertices
$vertices = array(150, 10, 250, 100, 250, 200, 50, 200, 50, 100);

// fill with white
ImageFill($im, 0, 0, $white);

// draw pentagon
ImagePolygon($im, $vertices, 5, $blue);

// fill pentagon with green until it reaches blue border
ImageFillToBorder($im, 150, 150, $blue, $green);

// output to browser
ImageGIF($im);
?>
Here’s what it looks like:
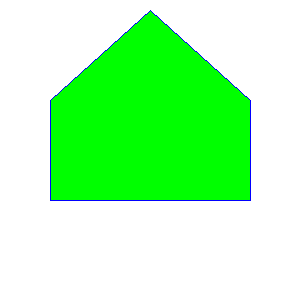
The ImagePolygon() function needs to know the number of vertices - five, in this case - as well as the coordinates of each; in the example above, these coordinates are stored as (x,y) pairs in the array $vertices.
Once the polygon has been drawn, I’ve used one of the more useful functions, ImageFillToBorder() to fill it with a specific colour. The ImageFillToBorder() function starts at a specific point and flood-fills the area around it with a specific colour (here, green) until it reaches a border of another specified colour (here, blue).
Round And Round We Go…
If circles turn you on, PHP has a function that allows you to draw circular shapes as well - the ImageArc() function can draw circular arcs of a specified colour on to your image.
<?php
// header
Header("Content-Type: image/gif");

// set up image and colours
$im = ImageCreate(300, 300);
$white = ImageColorAllocate($im, 255, 255, 255);
$black = ImageColorAllocate($im, 0, 0, 0);

// variables for arc
// circle center
$center_x = 150;
$center_y = 150;

// height and width
$width = 150;
$height = 150;

// start and end angle
$start = 0;
$end = 360;

// fill with white
ImageFill($im, 0, 0, $white);

// draw pentagon
ImageArc($im, $center_x, $center_y, $width, $height, $start, $end, $black);

// output to browser
ImageGIF($im);
?>
That’s pretty self-explanatory - and here’s what it looks like.

You can adjust the height and width to get an oval ellipse, or fiddle with the start and end degrees to get a semi-circle or other partial ellipse.
PHP For The Couch Potato
Now, all this is fine and dandy…but what if you’re not really interested in using PHP to create a full-fledged image from scratch? What if you have a team of highly-paid designers working overtime to provide you with digital works of art, and all you need to do is make minor changes to them - for example, re-using the same button with different bits of text?
Well, that’s why PHP has the ImageCreateFromGIF(), ImageCreateFromJPEG() and ImageCreateFromPNG() functions; they’re meant specifically for situations where you need to create a new image from a pre-existing one.
The following example demonstrates how a pre-existing button can be used to create multiple menu items. First, here’s the button, intelligently named “button.gif”

And here’s the code to write text to the button - note the manner in which the image dimensions, the font dimensions and the string length are used to calculate the center of the image, and then subtract 50% of the length of the string from that point to obtain the actual coordinates of the point at which to start writing the text string. Whew!
<?php

// button.php4 - used to write text to a GIF

// header
Header("Content-Type: image/gif");

// set up image and colours
$im = ImageCreateFromGIF("button.gif");
$white = ImageColorAllocate($im, 255, 255, 255);

// get font dimensiona
$font_height = ImageFontHeight(3);
$font_width = ImageFontWidth(3);

// get image dimensiona
$image_height = ImageSY($im);
$image_width = ImageSX($im);

// get string length
$length = $font_width * strlen($channel);

// calculate start coordinates for string
$image_center_x = ($image_width/2)-($length/2);
$image_center_y = ($image_height/2)-($font_height/2);

// write string
ImageString($im, 3, $image_center_x, $image_center_y, $channel, $white);

// output to browser
ImageGIF($im);
?>
The ImageSX() and ImageSY() functions return the width and height of the image respectively; another function that does almost the same thing is the GetImageSize() function, which returns both the type of image and its dimensions.
And finally, here’s the page which will actually display the images:
<?php
// data for menu items

// typically this data comes from a database
// an array is used here for simplicity

$menu_items = array();
$menu_items[0] = "CNN News";
$menu_items[1] = "Cartoon Network";
$menu_items[2] = "MTV";
$menu_items[3] = "HBO";
$menu_items[4] = "NBC";
$menu_items[5] = "Sports";

?>

<html>
<head>
<basefont face=arial>
</head>

<body>

<center><h2>Pick A Channel</h2></center>

<table border=0>

<?php
// loop for each item in array
foreach ($menu_items as $channel) {
    // and print table row ?>

<tr>
<td>
<a href="#"><img src="button.php4?channel=<?php echo $channel; ?>" border=0></a>
</td>
</tr>

<?php
}
?>

</table>

</body>
</html>

As you can see, the data to be printed on each image is stored as an array - you can just as easily extract it from a database. A “foreach” loop is used to iterate through the array, printing a new table row each time. Within each table row is an <IMG> tag, whose SRC attribute references the file “button.php4” and passes it a text string - this is the file that will actually combine the string and the pre-defined GIF image to create a new image each time.
It’s at times like this that PHP’s true power becomes obvious - in case you need to change the text on the image, you need simply edit the array item, as opposed to editing the GIF image in an image editor. It’s so beautiful it makes me want to weep!
Wrapping Things Up
There are a bunch of other miscellaneous functions as well - here’s a brief list:
ImageColorTransparent() - sets a specific colour to be transparent
ImageInterlace() - sets the image to be (non)interlaced
ImageColorAt() - returns the palette index of the specified pixel
ImageColorExact() - returns the palette index of the specified colour
ImageColorsTotal() - returns the total number of colours in the palette
ImageColorDeAllocate() - de-allocate a colour for an image; the reverse of ImageColorAllocate()
ImageDestroy() - frees all memory associated with an image
ImageSetPixel() - highlight a pixel at specified coordinates in specified colour
ImageTTFText() - write string to image using specified TrueType font
Pie, Anyone?
Now that you’ve got a good understanding of just how to go about creating PHP images, it’s time to see a real-life application. The following example demonstrates how PHP can accept numeric data and turn it into a graph - specifically, a multi-coloured pie chart.
The form below asks for five or less data “slices”, in the form of numeric data. Once you’ve entered a few numbers, the “pie.php4” script converts them from absolute numbers into data chunks of different relative sizes, and uses these to draw a circle, mark out the different pie slices, and fill them with different colours.
<html>
<head>
<basefont face=arial>
</head>

<body>
<h3>Pie Chart Generator</h3>
<table>
<form action="pie.php4" method=get>
<tr>
<td>Slice 1</td>
<td><input type=text name=slice[1] value=0></td>
</tr>
<tr>
<td>Slice 2</td>
<td><input type=text name=slice[2] value=0></td>
</tr>
<tr>
<td>Slice 3</td>
<td><input type=text name=slice[3] value=0></td>
</tr>
<tr>
<td>Slice 4</td>
<td><input type=text name=slice[4] value=0></td>
</tr>
<tr>
<td>Slice 5</td>
<td><input type=text name=slice[5] value=0></td>
</tr>
<tr>
<td colspan=2 align=center><input type=submit value="Generate Pie Chart"></td>
</tr>
</form>
</table>

</body>
</html>
The data entered into the form is passed to the “pie.php4” script via an array variable named $slice. A loop then converts these numbers into degrees of a circle, and draws arcs for each slice. In each iteration of the loop, the coordinate of the end point of the arc is also calculated and a line segment in drawn to demarcate the arc from the rest of the circle.
Once the pie has been carved up, it’s time to fill the sections with colour. In order to do this, I’ve obtained the mid-point of each slice, and then filled the enclosed area (up to the nearest black border) with a different colour. Finally, a string is printed at the top of the chart.
I’m not going to go into the details of how the script calculates the length of each arc and line segment - the script includes commented code fragments.
<?php

// initialize some variables
$sum = 0;
$degrees = array();
$diameter = 200;
$radius = $diameter/2;

// calculate sum of slices
for ($x=1; $x<=5; $x++) {
    $sum += $slice[$x];
}

// convert each slice into corresponding percentage of 360-degree circle
for ($y=1; $y<=5; $y++) {
    $degrees[$y] = ($slice[$y]/$sum) * 360;
}

// set up image and colours
Header("Content-Type: image/gif");
$im = ImageCreate(300, 300);
$red = ImageColorAllocate($im, 255, 0, 0);
$blue = ImageColorAllocate($im, 0, 0, 255);
$green = ImageColorAllocate($im, 0, 255, 0);
$yellow = ImageColorAllocate($im, 255, 255, 0);
$black = ImageColorAllocate($im, 0, 0, 0);
$white = ImageColorAllocate($im, 255, 255, 255);

// fill image with white
ImageFill($im, 0, 0, $white);

// draw baseline
ImageLine($im, 150, 150, 225, 150, $black);

for ($z=1; $z<=5; $z++) {
    // calculate and draw arc corresponding to each slice
    ImageArc($im, 150, 150, $diameter, $diameter, $last_angle, ($last_angle+$degrees[$z]), $black);
    $last_angle = $last_angle+$degrees[$z];

    // calculate coordinate of end-point of each arc by obtaining
    // length of segment and adding radius
    // remember that cos() and sin() return value in radians
    // and have to be converted back to degrees!
    $end_x = round(150 + ($radius * cos($last_angle*pi()/180)));
    $end_y = round(150 + ($radius * sin($last_angle*pi()/180)));

    // demarcate slice with another line
    ImageLine($im, 150, 150, $end_x, $end_y, $black);
}

// this section is meant to calculate the mid-point of each slice
// so that it can be filled with colour

// initialize some variables
    $prev_angle = 0;
    $pointer = 0;

for ($z=1; $z<=5; $z++) {
    // to calculate mid-point of a slice, the procedure is to use an angle bisector
    // and then obtain the mid-point of that bisector
    $pointer = $prev_angle + $degrees[$z];
    $this_angle = ($prev_angle + $pointer) / 2;
    $prev_angle = $pointer;

    // get end-point of angle bisector
    $end_x = round(150 + ($radius * cos($this_angle*pi()/180)));
    $end_y = round(150 + ($radius * sin($this_angle*pi()/180)));

    // given start point (150,150) and end-point above, mid-point can be
    // calculated with standard mid-point formula
    $mid_x = round((150+($end_x))/2);
    $mid_y = round((150+($end_y))/2);

    // depending on which slice, fill with appropriate colour
    if ($z == 1) {
        ImageFillToBorder($im, $mid_x, $mid_y, $black, $red);
    } elseif ($z == 2) {
        ImageFillToBorder($im, $mid_x, $mid_y, $black, $blue);
    } elseif ($z == 3) {
        ImageFillToBorder($im, $mid_x, $mid_y, $black, $green);
    } elseif ($z == 4) {
        ImageFillToBorder($im, $mid_x, $mid_y, $black, $yellow);
    } elseif ($z == 5) {
        ImageFillToBorder($im, $mid_x, $mid_y, $black, $black);
    }
}

// write string
ImageString($im, 5, 100, 10, "Pie Chart", $black);

// output to browser
ImageGIF($im);

?>
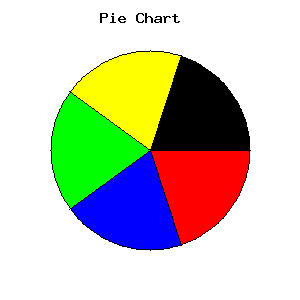
If you enter five data slices of equal value, your pie chart will look like this
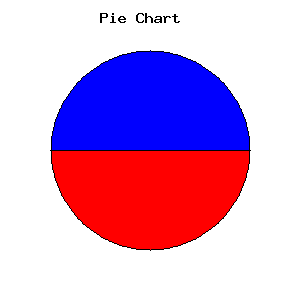
whereas two data slices of equal value will give you this.
Go on - play with it and see how the various slices change in shape to reflect the relative sizes of your data chunks. And while you’re enjoying yourself, I’ll bid you adieu…till next time!
Note: All examples in this article have been tested on Linux/i586 and Windows 95 with Apache 1.3.12, PHP 4.0.2 and Internet Explorer 5.0 YMMV!
This article was first published on 17 Oct 2000.