Revisiting The Past
A long, long time ago, during my early days with Web application development, I was asked to write an administration module for a Web site. This module was to be available only to site administrators, and so required user authentication, or login, at the entry point itself. I didn’t know much about Web development at the time, but I did my best and handed the code over to the QA people for testing.
As it turned out, my user authentication module had enough security holes in it to drive a few hundred dump trucks through. I spent the next week plugging those holes, and along the way learnt a number of valuable things about access control - most notably, that it’s not as easy or as obvious as you might think.
There are a number of reasons why you might want to add user authentication to your Web site. You might want to restrict access to certain pages only to a specific group of privileged users. You might want to customize the content on your site as per user preferences. Or you might just want to track user movement between the pages of your site. Regardless of why you want to add it, you should know how to go about doing it reliably and efficiently.
That’s where this article comes in. Over the next few pages, I’ll be showing you how to authenticate users, maintain session information and handle login/logout operations, using both built-in Apache authentication and custom PHP code. So keep reading.
Of Myth And Men
Before we get into the nitty-gritty of code and syntax, there’s one very important thing that you should be aware of. It’s a common myth among newbie developers that access control is merely a matter of verifying a user’s password once, and allowing or denying access to a single page based on the results of that verification. While this description is certainly true, it’s also incomplete, as it fails to address the matter of re-verifying user credentials on all subsequent, linked pages after the initial user login.
In real-world development projects, access control typically involves writing code to handle the following events:
-
Initial user verification and session creation (login): The first time a user logs in to a Web site, a Web application must be capable of requesting the user’s credentials (usually a unique username/password combination), and allowing or denying access based on these credentials. This step also involves the creation of a persistent user “session”, which stores user variables across multiple HTTP transactions.
-
Session maintenance and re-verification of user credentials: Once a user has logged in successfully, the application must be able to re-verify the user’s credentials, on a per-page or per-script basis, and allow or deny access to specific pages or scripts based on this user data (the session created at the first step comes in very handy here). At the very least, the application must check to ensure the existence of a valid user session; more complex applications may additionally perform second-tier checks to ensure that the user has appropriate permissions or security privileges to execute the script or view the page.
-
Session destruction (logout): The application must provide the user with the ability to log out and thereby destroy all user-specific session variables created during the first step. Though this is the last step in the process, its importance cannot be underrated; omitting it can have serious repercussions on the security of your Web application.
In order for a Web application to be considered even marginally secure, it must address all three of the requirements above.
Back To Basics
Now, there are a couple of different ways to go about adding this type of security to your application. The first (and most primitive, though also the simplest) is to simply have your Web server handle authentication for you. If you’re using the Apache Web server (you probably are), you can access the server’s authentication features to add basic security to your Web site.
In order to illustrate how this works, let’s consider a simple example. Let’s assume the existence of the following directory structure:
/usr/local/apache/htdocs/
                         index.html
                         alpha.html
                         beta.html
                         admin/
                               index.cgi
Now, let’s suppose that I want to protect the directory “admin”. It’s fairly simple to do with HTTP authentication.
The first step is to ensure that your Apache build includes support for the “mod_auth” module. You can check this by executing the Apache binary with the “-l” command-line option.
$ /usr/local/apache/bin/httpd -l
Compiled-in modules:
  http_core.c
  mod_env.c
  mod_log_config.c
  mod_mime.c
  mod_negotiation.c
  mod_status.c
  mod_include.c
  mod_autoindex.c
  mod_dir.c
  mod_cgi.c
  mod_asis.c
  mod_imap.c
  mod_actions.c
  mod_userdir.c
  mod_alias.c
  mod_access.c
  mod_auth.c
  mod_setenvif.c
  mod_php4.c
If you don’t see “mod_auth” in the list, you’ll need to recompile Apache with support for that module.
Next, check Apache’s configuration file, “httpd.conf”, and ensure that the option
AllowOverride All
is present in the section for the server document root. This allows you to override global server settings via per-directory “.htaccess” control files.
Next, create a file named “.htaccess” in the “admin” directory, and put the following lines into it:
AuthType Basic
AuthUserFile /usr/local/apache/users
AuthName "Administration Module"
Require valid-user
This tells the server that access to the “admin” directory (the directory in which the “.htaccess” file is located) is to be controlled, and access is to be granted to users based on the username/password information in the file “/usr/local/apache/users”
The final step is to create the “users” file. Change to the “/usr/local/apache” directory (or whichever directory you’ve decided to store the user data in) and use the “htpasswd” command:
$ htpasswd -c users john
New password: ****
Re-type new password: ****
Adding password for user john
You can add more users to this file if you like (remember to omit the “-c” parameter for all subsequent additions, as that parameter creates a brand-new, empty file).
Remember not to store the “users” file in a directory under the server document root, or else malicious users will be able to view and download the password database through a browser.
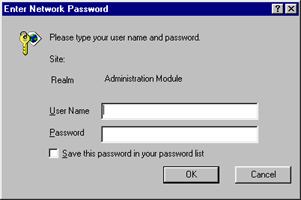
Now, attempt to access the “admin” directory via your Web browser. The browser should pop up a dialog box and prompt you for a username and password. Access to the “admin” directory will be granted only if you enter a correct username and password, as defined in the “users” file.
The Right Creds
So that takes care of the login. Now, what about session verification and logout?
Every time you attempt to access a page under the protected directory, the server will automatically ask for your credentials again. You probably won’t see the dialog box again, though, because the password entered the first time is cached for the duration of your visit, and the browser will automatically take care of resending user credentials every time you access a page within the protected area.
In order to log out, you’ll have to close the browser. There currently exists no way to “flush” the password cache in the major browsers (although Lynx allows you to do this via the underscore (_) key command).
You can also protect specific files within a directory, rather than the entire directory, if you like. Simply wrap the authentication commands in the “.htaccess” file in a <Files>…</Files> block, as in the example below:
<Files add.cgi edit.cgi delete.cgi index.cgi>
AuthType Basic
AuthUserFile /usr/local/apache/users
AuthName "Administration Module"
Require valid-user
</Files>
This protects only the four files “index.cgi”, “add.cgi”, “edit.cgi” and “delete.cgi” in the “admin” directory, leaving all other files unprotected.
Hidden Costs
The process outlined on the previous page works very well, and should satisfy your need for basic security in a Web application or on a Web site, especially if you’re not looking for anything too complicated. However, this simplicity comes at a price.
If you’re relying on Apache to handle user authentication for you, you’re forced to use the process outlined on the previous page. You’re stuck with the Apache way of doing things, and cannot alter the data source used for user verification (for example, an SQL database or a file containing data in a different format).
So, if you’re working on a legacy system which already has user information in a different format, using Apache’s HTTP authentication is probably not a good idea, since integrating the two authentication schemes will involve:
-
converting, or migrating, the existing user database to an Apache-compliant format. This may require you to keep two copies of the same data (and update both whenever either one changes) or port legacy code over to use the new format. Both options are difficult, time-consuming and sub-optimal.
-
using two different authentication schemes, one for Apache and one for the prior legacy system. This is user-unfriendly, since it requires every user to remember two usernames and passwords, and also makes your application difficult to maintain or upgrade in future.
-
hacking the Apache source code to use the user information from the legacy system instead of its own format. If you have the time, patience and QA personnel for this development effort, great. If not, this option is probably unacceptably complicated.
Another important limitation with Apache’s HTTP authentication feature is the lack of control over the graphical user interface displayed for login. HTTP authentication works by having the server send “HTTP/1.0 404 Unauthorized” headers to the browser, and relying on the browser to respond by popping up an appropriate GUI for login. Most of the time, this GUI takes the form of a system dialog box, with fields for user name and password. Since this dialog box is internally generated by the browser, it cannot be customized or altered in any way.
When designing custom, branded Web applications or products, this lack of control is typically deemed unacceptable. Most of the time, it’s considered preferable to have a login GUI that fits in with the look and feel of the application, and that can be customized to the customer or user’s requirements.
This does not mean that HTTP authentication via Apache is bad. It simply means that it may not fit every situation. In case it fits your specific needs, great - you can stop reading right now and catch a few winks. In case it doesn’t, keep reading for an alternative approach.
Logging In
The alternative approach involves bypassing Apache’s HTTP authentication altogether, relying instead on custom programming to perform access control and session management. This allows you to customize both the user interface presented for login, and also the data source used for credential verification.
You can write code for this in any language; I’ll be using PHP, since it comes with built-in session management support, which will make things easier.
Let’s assume the following directory structure:
/usr/local/apache/htdocs/
                         index.php
                         login.php
                         error.php
                         inner.sanctum.php
Let’s also assume that the file I need to protect is “inner.sanctum.php”
First up, I need to define my custom login form. Here’s what I came up with:
<?php
// index.php - login form
?>
<html>
<head>
<basefont face="Verdana">
</head>

<body>

<center>
<table border="0" cellspacing="5" cellpadding="5">
<form action="login.php" method="POST">
<tr>
	<td>Username</td>
	<td><input type="text" size="10" name="f_user"></td>
</tr>
<tr>
	<td>Password</td>
	<td><input type="password" size="10" name="f_pass"></td>
</tr>
<tr>
	<td colspan="2" align="center"><input type="submit" name="submit" value="Log In"></td>
</tr>
</form>
</table>
</center>

</body>
</html>
Here’s what it looks like:
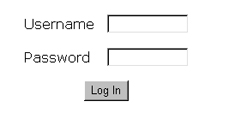
Once the user submits this form, the username and password entered will be stored in the form variables $f_user and $f_pass respectively. These variables can be accessed by the PHP-based form processor, coming up on the next page.
Rank And File
Now, if you look closely at the HTML markup on the previous page, you’ll see that the form references the script “login.php”. This PHP script actually performs the task of validating the user information entered into the form against an external source. In this case, the external source is the system’s “/etc/passwd” file.
Here’s the script which performs the validation:
<?php

// login.php - performs validation

// authenticate using form variables
$status = authenticate($f_user, $f_pass);

// if  user/pass combination is correct
if ($status == 1)
{
	// initiate a session
	session_start();

	// register some session variables
	session_register("SESSION");

	// including the username
	session_register("SESSION_UNAME");
	$SESSION_UNAME = $f_user;

	// redirect to protected page
	header("Location: /inner.sanctum.php");
	exit();
}
else
// user/pass check failed
{
	// redirect to error page
	header("Location: /error.php?e=$status");
	exit();
}


// authenticate username/password against /etc/passwd
// returns: -1 if user does not exist
//           0 if user exists but password is incorrect
//           1 if username and password are correct
function authenticate($user, $pass)
{
	$result = -1;

	// make sure that the script has permission to read this file!
	$data = file("passwd");

	// iterate through file
	foreach ($data as $line)
	{
		$arr = explode(":", $line);
		// if username matches
		// test password
		if ($arr[0] == $user)
		{
			// get salt and crypt()
			$salt = substr($arr[1], 0, 2);

			// if match, user/pass combination is correct
			// return 1
			if ($arr[1] == crypt($pass, $salt))
			{
				$result = 1;
				break;
			}
			// otherwise return 0
			else
			{
				$result = 0;
				break;
			}
		}

	}
	// return value
	return $result;
}

?>
Pay special attention to the authenticate() function, which forms the core of the script above. This is the function that actually does the hard work of accepting a username/password combo, iterating through the password file, crypt()-ing and matching the user’s input against the encrypted data in the file, and finally returning a result code based on the results of the comparison.
In case you’re wondering about the actual mechanics of the validation, it’s fairly simple. The authenticate() reads the system’s password file (“/etc/passwd” here), looks for a line beginning with the specified username, and extracts the first two letters of the corresponding encrypted password string. These two characters serve as the “salt” for the encryption process.
Next, the cleartext password is encrypted with PHP’s crypt() function and the extracted “salt”, with the result checked against the encrypted value in the password file. If the two match, it implies that the supplied password was correct; if they don’t, it implies that the password was wrong. Either way, the result of this authentication procedure is then returned to the caller via a result code.
Assuming that the user has been successfully authenticated, a PHP session is instantiated via the session_start() function, and some session variables are registered. These session variables remain active for the duration of the user’s visit to the site. In the example above, I’ve registered $SESSION (a flag variable to indicate that a session is active) and $SESSION_UNAME (the user’s account username) as session variables
Note also that I have found it a good practice to capitalize session variable names, so as to distinguish them from the local variables found in individual script. Again, this is a personal quirk - feel free to ignore it if you think it’s stupid.
Once all the session variables have been set up, the browser is redirected to the protected page, “inner.sanctum.php”. We’ll look at that, and also at the error handler “error.php” shortly - but first, let’s look at an alternative scenario, which uses a database for user validation.
Heavy Iron
In the event that you want to validate user credentials against information in a database, rather than a file, it’s fairly easy to modify the script on the previous page to work with this requirement. Let’s assume that the user data is stored in a MySQL table, which looks like this:
mysql> select * from user;
+----+----------+------------------+
| id | username | password         |
+----+----------+------------------+
|  1 | john     | 2ca0ede551581d29 |
|  2 | joe      | 7b57f28428847751 |
|  3 | tom      | 675bd1463e544441 |
|  4 | bill     | 656d52cb5d0c13cb |
+----+----------+------------------+
4 rows in set (0.16 sec)
This is a simple two-column table, with the unique usernames in one column and an encrypted password in the other. Now, when the user logs in, the information entered into the form needs to be validated against the information in this table.
Here’s the modified “login.php” script:
<?php

// login.php - performs validation

// authenticate using form variables
$status = authenticate($f_user, $f_pass);

// if  user/pass combination is correct
if ($status == 1)
{
	// initiate a session
	session_start();

	// register some session variables
	session_register("SESSION");

	// including the username
	session_register("SESSION_UNAME");
	$SESSION_UNAME = $f_user;

	// redirect to protected page
	header("Location: /inner.sanctum.php");
	exit();
}
else
// user/pass check failed
{
	// redirect to error page
	header("Location: /error.php?e=$status");
	exit();
}

// authenticate username/password against a database
// returns: 0 if username and password is incorrect
//          1 if username and password are correct
function authenticate($user, $pass)
{
	// configuration variables
	// normally these should be sourced from an external file
	// for example: include("dbconfig.php");
	// variables explicitly set here for illustrative purposes
	$db_host = "localhost";
	$db_user = "login_agent";
	$db_pass = "secret";
	$db_name = "system";

	// check login and password
	// connect and execute query
	$connection = mysql_connect($db_host, $db_user, $db_pass) or die ("Unable to connect!");
	$query = "SELECT id from user WHERE username = '$user' AND password = PASSWORD('$pass')";
	mysql_select_db($db_name);
	$result = mysql_query($query, $connection) or die ("Error in query: $query. " . mysql_error());

	// if row exists -> user/pass combination is correct
	if (mysql_num_rows($result) == 1)
	{
		return 1;
	}
	// user/pass combination is wrong
	else
	{
		return 0;
	}
}

?>
Most of the changes here are localized to the authenticate() function. In this case, rather than reading a text file, the function uses PHP’s MySQL functions to connect to the database, execute a SELECT query, and verify whether or not the information entered by the user was correct. Based on the result code returned by the function, a decision can be taken whether to redirect the user to the protected page or to the error handler.
There’s one important thing to note when performing this kind of authentication. From the security point of view, it’s not a good idea to include the password field in the result set returned by the query. Rather, you should perform validation by using the password as a key (via the WHERE clause) within the SELECT query. If a match is found for that particular username/password combination, the returned record set will contain a single row; if no match is found, the record set will contain zero rows. Either way, it’s possible to identify whether or not validation was successful, and return an appropriate result code, without ever passing any sensitive password information back and forth.
Sock It To Me, Baby!
So that takes care of authentication via flat file and database. There is one more authentication option, though it’s not one that’s very common in the Web environment. In the arena of networked set-top applications, there often exist proprietary authentication schemes, and proprietary methods of performing user authentication.
In one such system that I worked on, authentication took place via a socket server listening on a specific port for connections. This socket server could accept a username/password combination, in the form “username:password” and return an appropriate result code depending on whether or not the validation was successful.
In such a system, the authenticate() function in the “login.php” script could be further modified to use a socket connection to perform the validation, rather than a database or a file. Take a look at what this might look like:
<?php
// login.php - performs validation

$status = authenticate($f_user, $f_pass);

// if  user/pass combination is correct
if ($status == 1)
{
	// initiate a session
	session_start();

	// register some session variables
	session_register("SESSION");

	// including the username
	session_register("SESSION_UNAME");
	$SESSION_UNAME = $f_user;

	// redirect to protected page
	header("Location: /inner.sanctum.php");
	exit();
}
else
// user/pass check failed
{
	// redirect to error page
	header("Location: /error.php?e=$auth");
	exit();
}


// authenticate username/password against data from a socket connection
// returns: -1 if user does not exist
//           0 if user exists but password is incorrect
//           1 if username and password are correct
function authenticate($user, $pass)
{
	// where is the socket server?
	$host ="192.168.1.99";
	$port = 1234;

	// assign authentication status -1
	$result = -1;

	// open a client connection
	$fp = fsockopen ($host, $port, $errno, $errstr);

	if (!$fp)
	{
	   		return $result;
	}
	else
	{
		// get the welcome message
		fgets ($fp, 1024);

		// create the input string
		$message = "$user:$pass";

		// write the user string to the socket
	  	fputs ($fp, $message);

		// get the result
		// this will be 0 or 1
		$result .= fgets ($fp, 1024);

		// close the connection
		fputs ($fp, "END");
		fclose ($fp);

		// trim the result
		$result = trim($result);
	}

	return $result;

}

?>
Fairly simple, this. A socket connection is opened to the socket server from the PHP script (which acts as a client), and the form data transmitted to it via a call to fsockopen(). The socket server then internally runs a proprietary validation routine to test whether or not the data passed to it is correct, and returns a result code to the client. This return value can be intercepted via the fgets() function, and returned to the main program, which then again makes the decision of what to do next.
As I said, it’s unlikely that you’ll ever find yourself using this. It’s included here for illustrative purposes only, as an example of yet another way of performing authentication in a proprietary environment.
Entering The Inner Sanctum
So that takes care of the initial verification. Assuming the user has been successfully validated, all three versions of the “login.php” script above would create a new session and redirect the user to the protected page “inner.sanctum.php”.
Now for the second part of the validation, and the one that you might not have thought of. Every protected page must itself include program code to ensure that only authorized users have access to it. Without this code, it would be possible for anyone to access the page directly, just by typing the URL into their browser’s address bar.
Here’s what the code for inner.sanctum.php looks like:
<?php
// inner.sanctum.php - secure page

// session check
session_start();
if (!session_is_registered("SESSION"))
{
	// if session check fails, invoke error handler
	header("Location: /error.php?e=2");
	exit();
}
?>

<html>
<head>
<basefont face="Verdana">
</head>

<body>

<center>
Welcome to the inner sanctum. We've been waiting for you.
</center>
<p align="right">
<font size="-1"><a href="logout.php">Goodbye</a></font>
</body>
</html>
Note the code right at the top of the page. I’m first checking to ensure that a valid session exists for this user, and only proceeding to display the page if it does. If a valid session does not exist, it would imply that the user was either unable to log in successfully, or that (s)he bypassed the login screens altogether and attempted to access the page directly. In either case, access should be denied - which is why I’ve used the header() function to redirect the user to the error page immediately.
This is a very primitive check, of course - I’m merely testing to see whether a session exists. In the real world, you’d typically want to add a few more checks, such as verifying the user’s permission level or role (common in the case of multi-tiered, group-based systems).
In order to understand the difference, try accessing the page above by directly typing the URL into your browser’s address bar without logging in first. You should not be allowed access. Then comment out the PHP code at the top of the script, and try again. You’ll see that, this time, you can access this “protected” page without needing to log in first.
Here’s what the page looks like:

Time To Live
Finally, once the user has logged in, it is good practice to offer a log out button on every page. This provides the user with the ability to manually destroy the session and session variables created during the initial log-in phase, and eliminates the possibility of malicious users “spoofing” sessions.
Here’s what “logout.php” looks like:
<?php
// logout.php - destroys session and returns to login form

// destroy all session variables
session_start();
session_destroy();

// redirect browser back to login page
header("Location: /index.php");
?>
The session_destroy() function provides a convenient way to destroy all information in the current session.
You should also make it a point to specify a session lifetime in your PHP configuration, so that sessions are automatically destroyed if inactive for a specific period of time (thirty minutes is generally considered reasonable).
Obviously, you can also destroy a session just by closing your browser, just as with HTTP authentication.
A Stitch In Time
Assuming an authentication or session test fails, you’ve seen that the script “error.php” is invoked, and passed a cryptic error code via the $e variable. This “error.php” script is a generic error-handling script that produces an appropriate error message depending on the code passed to it. Take a look:
<?php
// error.php - destroys session and returns to login form
?>

<html>
<head>
<basefont face="Verdana">
</head>

<body>

<?php

// check the error code and generate an appropriate error message
switch ($e)
{
	case -1:
		$message = "No such user.";
		break;

	case 0:
		$message = "Invalid username and/or password.";
		break;

	case 2:
		$message = "Unauthorized access.";
		break;

	default:
		$message = "An unspecified error occurred.";
		break;
}
?>

<center>
<?php echo $message; ?>
<br>
Please <a href="index.php">log in</a> again.
</center>

</body>
</html>
Very simple - check the error code, print an appropriate message to let the user know what happened.
Obviously, this script does not have any session checks at the top. Adding a session check to an error handler which includes code to trap the error of a user failing a session check would be reminiscent of that chicken-and-egg situation we all know and love.
Closing Time
And that’s about it from me. If you’d like to read more about the techniques and functions discussed in this article, the following links are well worth a looksee:
User authentication with Apache, at http://www.apacheweek.com/issues/96-10-18#userauth
The Apache manual page on authentication, at http://httpd.apache.org/docs/howto/auth.html
The PHP manual page on session functions, at http://www.php.net/manual/en/ref.session.php
Zend.com’s article on user authentication with PHP, at http://zend.com/zend/tut/authentication.php
Till next time…stay healthy!
Note: All examples in this article have been tested on Linux/i586 with Apache 1.3.20 and PHP 4.1.1. Examples are illustrative only, and are not meant for a production environment. Melonfire provides no warranties or support for the source code described in this article. YMMV!
This article was first published on 28 Feb 2002.