Heavy Metal
Three weeks ago, I started you off on a tour of Zope Page Templates, explaining what they were and how they could make your life more interesting. I unraveled the mystery behind TAL, the attribute language used in ZPT, and TALES, the expression syntax that allows you to use TAL in a logical manner. I showed you how to place content and replace text within a template, define variables, create and use conditionals and loops, and use ZPT’s error-handling capabilities
So where that does leave us? At the threshold of the concluding article of this series, in which I’ll be explaining the third component of the ZPT jigsaw: METAL.
METAL, or Macro Expansion for TAL is “…an attribute language for structured macro preprocessing”. Translated, this means that METAL allows you to simplify your ZPT development with macros, code snippets that can be reused extensively across one or more templates. The obvious advantage of this: a single change in the macro will be immediately visible at all places that it has been referenced.
Let’s see how it works.
The Idiot Box
Every macro has two syntactical parts: the macro definition, and the macro invocation. Here’s a simple example:
<html>
<head>
</head>
<body>

<comment>
<b metal:define-macro="author">John Doe</b>
<i metal:define-macro="title">A Million Channels, And Nothing To Watch</i>
</comment>
<p>
The book <span metal:use-macro="container/BookReview/macros/title">book title</span>, written by <span metal:use-macro="container/BookReview/macros/author">author name</span> is a stunningly original piece of literature.
</p>
<hr>
Send mail to <span metal:use-macro="container/BookReview/macros/author">author name </span> with feedback on <span metal:use-macro="container/BookReview/macros/title">book title</span>.
</body>
</html>
Here’s what the output looks like:

There are two parts to using a macro in your ZPT code: first, you define the macro, using the “define-macro” attribute, as in the code snippet below,
<comment><b metal:define-macro="author">John Doe</b>
<i metal:define-macro="title">My Story</i>
</comment>

// snip
and then you use it via the “use-macro” attribute, as below:
The book <span metal:use-macro="container/BookReview/macros/title">book title</span>, written by <span metal:use-macro="container/BookReview/macros/author">author name</span> is a stunningly original piece of literature.
In the lines of code above, I’ve used a TALES path expression to access the value of the “author” and “title” macros. Note that the path expression begins with the special pre-defined “container” variable, followed by the name of the Page Template containing the macro definitions. Since the macros are exposed as attributes of the Page Template, the expression
container/BookReview/macros/title
returns the value stored in the macro “title”.
Take a quick peek at the HTML code that is generated:
<html>
<head>
</head>
<body>

<comment>
<b>John Doe</b>
<i>A Million Channels, And Nothing To Watch</i>
</comment>
<p>
The book <i>A Million Channels, And Nothing To Watch</i>, written by <b>John Doe</b> is a stunningly original piece of literature.
</p>
<hr>
Send mail to <b>John Doe</b> with feedback on <i>A Million Channels, And Nothing To Watch</i>.
</body>
</html>
In the original code, I have a plethora of <span> elements; however, none of them make an appearance in the rendered output. The reason for this is simple: the “use-macro” attribute replaces everything, including its containing element (which was the <span> element) with the results of the macro.
Now, if you’ve been paying attention, you’re probably wondering - why not just use the “define” TAL attribute for this? The next page should make things clearer.
The Real McCoy
With Web sites and applications growing ever more complex, and with the line between interface design and business logic growing more and more blurred every day, it’s becoming harder and harder to write easily-maintainable code. Templates can make things easier by allowing developers to separate program code from interface elements cleanly and efficiently - and METAL’s macros add one more level of flexibility to the toolkit, making it possible to create snippets of code that can be easily edited, referenced and yes, maintained.
Enough of the marketing talk - here’s a simple example. Let’s define two macros in a template named “macroDef”:
<div align="center" metal:define-macro="header">
<h3>You are currently viewing the official Melonfire Web site. Accept no substitutes.</h3>
</div>
<p metal:define-macro="footer">
<hr align="center">
<font size="1">©2002, Melonfire. All rights reserved.</font>
</p>
Here, the “header” and “footer” macros contain code for the display of the page header and footer respectively. In my earlier example, my next step was to invoke these macros from further down in the same page - but this time around, I’m going to add a little twist (and simultaneously answer the question I posed on the previous page) by invoking these from a different template.
Here’s my second template, named “HomePage”:
<html>
<body>
<div align="center"
metal:use-macro="container/macroDef/macros/header">
<h3>You are currently viewing the official Melonfire Web site. Accept no substitutes.</h3>
</div>
<p align="center">Page content here.</p>
<div align="center"><p metal:use-macro="container/macroDef/macros/footer">
<hr align="center">
<font size="1">©2002, Melonfire. All rights reserved.</font>
</p></div>
</body>
</html>
Here’s what the output looks like:
In this example, the “use-macro” attribute invokes the “header” and “footer” macros at appropriate places in my page template. Since both the target template and the macro definitions are located in the same folder, the macros can be invoked using the same TALES expression syntax as in the previous example.
By allowing developers to define macros in one template, and use them in another (or in a number of different templates), METAL offers far more power than the regular TAL “define” or “replace” attributes, especially from the maintenance point of view; a change to the macro definition is immediately reflected in all templates that use the macro.
It isn’t always necessary to keep both the macro definitions and the templates that invoke them in the same folder - the following example demonstrates how a macro stored in a sub-folder can be accessed by a template in the parent folder:
<html>
<body>
<div align="center"
metal:use-macro="container/Library/macroDef/macros/header">
<h3>You are currently viewing the official Melonfire Web site. Accept no substitutes.</h3>
</div>
<p align="center">Page content here.</p>
<div align="center"><p metal:use-macro="container/Library/macroDef/macros/footer">
<hr align="center">
<font size="1">©2002, Melonfire. All rights reserved.</font>
</p></div>
</body>
</html>
Want to place the macro definitions in the root folder? Use the special “root” variable in your path expression, as below:
<html>
<body>
<div align="center"
metal:use-macro="root/macroDef/macros/header">
<h3>You are currently viewing the official Melonfire Web site. Accept no substitutes.</h3>
</div>
<p align="center">Page content here.</p>
<div align="center"><p metal:use-macro="root/macroDef/macros/footer">
<hr align="center">
<font size="1">©2002, Melonfire. All rights reserved.</font>
</p></div>
</body>
</html>
Slotting Into Place
METAL also introduces the concept of “slots” within a macro, which may in turn be populated by other macros. Slots are placeholders within a macro definition, which can be populated dynamically every time you use the macro.
Let’s take a simple example to demonstrate how this works. Here’s the macro definition, which contains a placeholder, or slot, named “link”:
<p metal:define-macro="spotlight">
Today's special is <span metal:define-slot="title"></span>
</p>
And here’s the template which uses it - note how the placeholder has been filled with an actual value using the “fill-slot” attribute:
<p metal:use-macro="container/macroDef/macros/spotlight">
Today's special is <span metal:fill-slot="title"><a href="http://www.melonfire.com/community/columns/trog/">the DTML Basics series</a></span>
</p>
Here’s what the output looks like:
By using a slot within a macro, I have the option of reusing the macro multiple times, and replacing the slot with different data each time I use it. This adds a tremendous amount of reusability to the macro, and can thereby substantially simplify the task of developing almost-but-not-quite-identical programming routines.
Here’s another, more realistic example - a macro which sets up the basic skeleton for a Web page, and uses slots to populate each instance of that page with different content:
<span metal:define-macro="body">
<table width="100%" cellspacing="10" cellpadding="10">
<tr>
<td colspan="2">Logo</td>
</tr>

<tr>
<td><span metal:define-slot="menu">Menu</span></td>
<td><span metal:define-slot="content">Content</span></td>
</tr>

<tr>
<td colspan="2"><hr>All rights reserved.</td>
</tr>

</table>
</span>
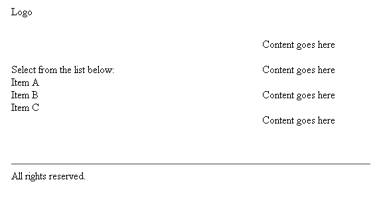
Here’s a sample Web page that uses the macro, and defines a particular look for the main body:
<html>
<body>

<span metal:use-macro="container/macroDefs/macros/body">

<span metal:fill-slot="menu">
Select from the list below:
<br>
Item A
<br>
Item B
<br>
Item C
<br>
</span>

<span metal:fill-slot="content">
<center>
Content goes here <p>Content goes here <p>Content goes here <p>Content goes here <p>
</center>
</span>
</span>

</body>
</html>
Here’s the output:
And here’s another one that uses the same macro, but a different look for the body:
<html>
<body>
<span metal:use-macro="container/macroDefs/macros/body">
<span metal:fill-slot="menu">
</span>
<span metal:fill-slot="content">
<table width=100% cellspacing="5" cellpadding="5">
<tr><td>Item A</td><td>Item B</td><td>Item C</td></tr>
<tr><td colspan="3"><hr></td></tr>
<tr><td colspan="3" align="center">Content goes here<p>Content goes here</p><p>Content goes here</p><p>Content goes here</p><p>Content goes here</p><p></p></td></tr>
<table>
</table></table></span>
</span>
</body>
</html>
Here’s the output:
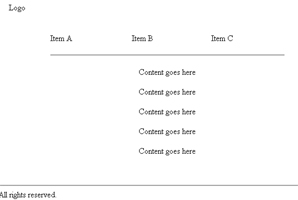
As you can see, the same macro’s been used in both examples; however, merely by changing the contents of the slots within the macro, I can generate a completely different look for each Web page.
Link Zone
And that just about concludes this little tour of METAL. In this final article, I showed you how to use macros in your templates, and demonstrated how they could substantially reduce the time spent on making changes to your Zope application while simultaneously adding a new level of reusability to your code. I also illustrated how METAL macros can be made even more flexible by the addition of “slots”, macro placeholders which can be dynamically replaced with different content each time the macro is invoked.
I hope you enjoyed this tutorial on Zope Page Templates, and that it gave you some insight into how your Zope applications can be made more modular. In case you’re looking for more information on Zope in general, or ZPT in particular, drop by the following links:
The official Zope Web site, at http://www.zope.org/
Zope documentation, at http://www.zope.org/Documentation
ZPT documentation, at http://www.zope.org/Wikis/DevSite/Projects/ZPT/FrontPage
ZPT language specifications, at http://www.zope.org/Wikis/DevSite/Projects/ZPT/LanguageSpecifications
A simple ZPT tutorial, at http://www.zope.org/Wikis/DevSite/Projects/ZPT/SimpleTutorial
The ZPT FAQ, at http://www.zope.org/Wikis/DevSite/Projects/ZPT/FAQ
The METAL HOW-TO, at http://www.zope.org/Members/tone/METAL
Until next time…be good!
Note: All examples in this article have been tested on Linux/i586 with Zope 2.5.0. Examples are illustrative only, and are not meant for a production environment. Melonfire provides no warranties or support for the source code described in this article. YMMV!
This article was first published on 29 Oct 2002.